
Senior Thesis: Troll
Started: Jan 21st, 2019
Ended: May 15th, 2020
As said above this is part of my senior thesis. We're a team of eight strong and we were one of three shorts made in our year. The other projects in our year were two "video games", and one independent project. In this, we took part in a group project to complete a short, which later got narrowed in scope, becoming a trailer. There will be more details in the various sections.
Also, this project was in the animation stage around the time that COVID-19 was picking up. COVID-19 started getting close around the 11th of March and the school closed officially the 16th. This measure was to help prevent the spread from getting too far. The team and I went online and worked remotely from home. This time period covers from the finishing of the sets to animation in the first week or so, until the end of the project.
The project was originally slated to be done on the 17th of April but due to the COVID-19 school shut down, the deadline was officially pushed to the showcase day/final day of spring semester the 15th of May. The group wanted to get things done by the 1st of May so we could have some breathing room for the finishing of the project, however, there were still some significant parts that weren't ready for rendering and we needed the extra time to complete them.
Our project was due on the 15th of May. However, due to an issue where our renders wouldn't run parallel to each other and all the other groups struggling to render we didn't turn in our most current version of the project. We were free to work on the project on our own time and on our own after the completion of the project. All the work after the deadline come from a copy of the project Heather and I worked on our own. There is another group copy I helped out with as well.
My Role
Originally, I was going to be a scribe. I take copious notes and when I do I usually can recall the details and where things are within those notes. Everyone wanted a say in things and we decided to do a rough kind of democracy for the decisions and running of the group. However, it fell apart. Heather and I stepped up to act more as leaders for the group. Heather largely takes on the more social aspects and helps with assignments, while I work more on organization, planning and working assignments for people. We also talk a lot about decisions and work well as a co-leader pair.
I maintained a co-leader position with Heather until the end of the project. And was used as a scribe whenever it was good to take notes on something. We worked on figuring out what needed attention and what didn't while balancing our team's varying personalities. We also papered over many of the cracks and bumps we found and saw so that other teammates wouldn't worry or get stressed over them. I composed messages and updates, with Heather, to the group about what people were supposed to be doing and to make sure everyone was on the same page.
I personally worked on mostly modeling, texturing, rigging, sets and organization. I also worked to fill some of the gaps and take care of things that fell through the cracks. I was a part of the early animatic team and helped to churn out some of the layout animatics. Everyone, including myself, helped with animation and got down some golden poses to help speed animation along. I also worked a lot on troubleshooting problems that people brought up and fixing the things that were forgotten about to get things ready for the final render.
I'm putting a link to the blog section of my website. That has more detail on some specifics during the project. This page just lays out the process and progress throughout the project. So the page omits some of the details that the blog might have. I only started the website a little before COVID-19 started really picking up. So the blog is missing some things from before March of 2020.
Pre-Production
Pre-production is the preliminary research and work that is done to help make the project go smoother. Originally, the whole class was going to work on this and one other project. Our first half of spring semester 2019 was whole class pre-production. The class shifted and we moved into smaller groups. Some of the mood boards come from other people during that first half of the spring semester. The latter half had the current team start working on pre-production for the project. During the fall semester of 2019, the group revised the animatics with feedback from our peers, professors and each other.
Mood Boards
Plant Research
Moodboards that were done by the class before we all got the option to split into other groups. Honestly, I'm not really sure who did each mood board. My group stayed with one of the original workshopped stories, and we liked the mood boards so kept them so we kept them even after people moved around. Most images are either pictures from people or straight from google.
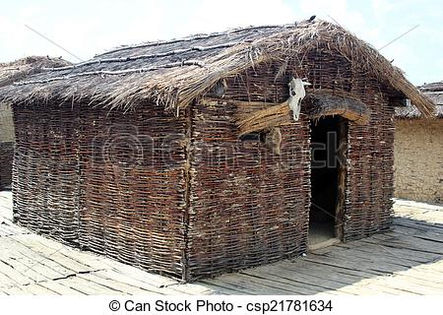
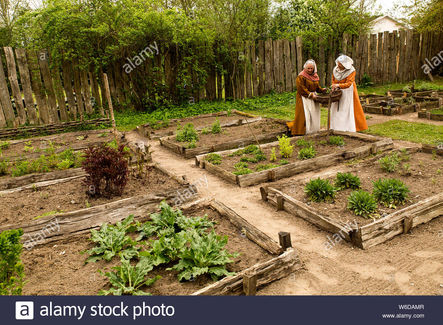
I worked on some plant research and the layout of the base layout of the interior. We originally wanter somewhere in the norse area. We largely didn't use much of the research outside of some design aspects. Such as the house or fence design. These images are from unsplash or google.
Concept Art
These are character sheets done by Heather Fritts. This is how we started the characters. The designs gave the character modelers especially a vision to follow as they start their models. The boy character was later cut from the story, check the 2D animatic section. Even towards the end, the colors were kept and designs were somewhat kept even though the revisions in models.
Set concepts
I worked on the interior of the house set. I did the original set up of how the interior looked in the original and the redo. Isabelle worked on the exterior and the combining of the various set concept art pieces. So we worked together to make the house layouts. The fence layout and design is shown here too.
2D Animatic
I don't remember everything and I am typing after the fact, so I'll try and include what I can remember. These videos are basically the story's changes throughout, mostly, the fall semester. I'll list what I can. The character designs were also finished in the Spring of 2019. I feel it's important to have some of the pre-production because I want to show what I signed up for and how it grew and changed over the year we worked on it.
Story Beats
The original story beats of the story. This was at a point when we had a boy character and the troll was first seen scaring him off the bridge. Later, when getting more shots in the length was around seven minutes and it was a worry from multiple parties if that was even manageable. The character of troll is that he's a misunderstood creature and granny takes the time to understand him.
Artists:
Connor Wood
Animatic ver 3
In this version, we entertained some more interesting edits and shots. We kept in the montage but attempted to make it a little more linear progression of character in the story. We hoped to tell more with less, but later with the review, we realized too much was going on. This version has a more fleshed out ending and the troll is still a grouch who isn't nice.
Artists listed in order of part:
Heather Fritts
Connor Wood
Isabelle Sanchez
Animatic ver 5
We changed the end to be more interesting and this is part we presented at the beginning of the spring semester. We worked off this for about a month. Around then we had some internal issues and the teachers stepped in with several options to help us narrow our scope so we don't mentally crack.
Artists listed in order of part:
Heather Fritts
Isabelle Sanchez
Connor Wood
Animatic ver 2
This animatic is after we cut some things down to try and cut down the time. We have a scene where the troll is being mean and breaking a bunch of trees but the faculty worried that it would be hard to do. We also have a montage of the troll learning to be good and the final confrontation in the woods near the cliff.
Artists listed in order of part:
Connor Wood
Megan McLaughlin
Isabelle Sanchez
Animatic ver 4
We decided to not use the cliff, moving the resolution in the garden. It would be simpler and one less set to do. Also, the last cliff set would have been somewhat empty with only trees and the characters.
A major critique given to us was that the end was boring because everyone made nice. We later spoke with our sound engineer and entertained some other ideas for the end.
Artists listed in order of part:
Heather Fritts
Isabelle Sanchez
Connor Wood
Trailer ver 3
This is a trailer cut using the parts of the 3D animatic people made off of version 5 of the animatic. We had to narrow the scope and this was cut from the various parts. Version 1 was a quick version that the editor threw together and everyone made notes on. Version 2 added the notes from the whole group. This version has notes from the professors and the whole group.
Editor:
Leah Roche
Layout Animatic
For a while, we had the first and second parts of the animatic pretty set. So the original animatic team comprised of Leah, Misha and myself. We used the sets that were largely blockouts that were quickly done in the 2019 Spring semester. We did the animation and camera work for our given sections. These are typically done to figure out where things are in a 3d space. It helps the team decide what level of detail things will be based on where the camera is and how the camera(s) move and characters look/move in a rough environment.
Animatic ver 4
Full Animatic
My Parts
For a while, we had the first and second parts of the animatic pretty set. So the original animatic team comprised of Leah, Misha and myself started the layout. Heather and Allen joined to help speed things up towards the tail end of it. We used the sets that were the current versions of them. We did the animation and camera work for our given sections. The animatic is somewhat incomplete because we changed the ending. I'll admit that we've never been shown a 3d animatic so we as a group kinda just winged it. Not the best plan but we did hit our stride by the animatic version 5.
Animatic ver 5
Full Animatic
My Parts
We needed the 3D layout animatic done as fast as possible so the whole team was put on it and we cranked it out in about a week and a half. This started giving us a baseline for where the animations will be and allow us to start working on the sets, we can then from there set dress. I think that we finally hit our stride with how to do a 3D animatic, it looks fairly clean and does meld all right.
Trailer Animatic
The trailer was cut from shots we largely already had made in the 3D layout of animatic version 5. A few shots were created from scratch involving the hunter.
Characters
These are the characters that were used in the trailer. I didn't model any of the characters but I did work on the full body rig for the troll. I think it's important to show them all because the characters are the subject of the trailer. I will list who did which character on the individual character parts.
The boy character was original in the early stages of the short but was later cut when we decided to not have the troll scare someone on the bridge. The troll and granny were the primary characters so they needed more detailed sculpts because they were hero characters. Granny later got changed to a more secondary character in the trailer due to how much she shows up. The troll remains the main focus of the trailer and short so he is the only character who has kept his hero character status. The hunter was originally a secondary character and later with the trailer was relegated to a background character.
Below are some images of all the characters. For more details on any of the characters please scroll or click the button to get to the character.
All Characters
This is a presentation of the characters together. I thought I'd be worth showing the different characters together because they need to feel like they're in the same world and work together. I have a handful of pre-renders of how the characters look.
Troll
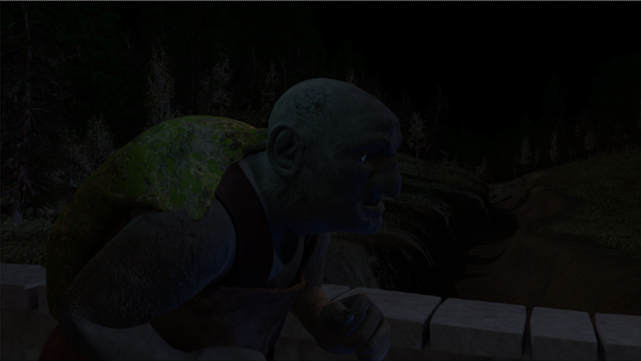
I worked with this character a fair amount because I was in charge of rigging him. The modeler and sculptor was Heather and the rigger was myself. The blend shapes were done by Connor and the body's textures were done by Misha. I worked on the clothes for the character.
I had a few strange difficulties with the jaw and went back several times to adjust and fix it. I also added some geometry inside the eyes so that the eyes would better fit the character. All the characters were built with slightly different eyes and so the set made for all the characters didn't quite fit right. So the solution was the geometry since it could be textured easily to blend and no one would have to go back. I believe both of the other characters have small pieces of geometry in their eyes as well. I did some minor changes to the weights as the team made playblasts of the animation and I saw things I missed on the weights when I had some time to spare. I did the final checks on the characters to make sure that each had everything they needed, as I rigged. In that, I found we needed to find his breastplate and apply it to him. We found that and I applied it to his rig. Another thing we forgot was to add eyelashes and brows. I was tasked with adding that to the characters. To make animating blinks easier on the animators, I hooked up a set of small controls that would move the eyelashes and eyelids at the same time (we didn't have time to hook up the blend shapes to any facial control panel).
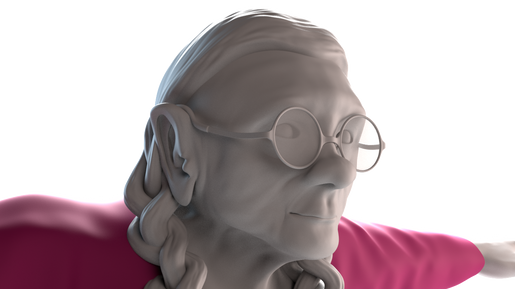
Granny
I didn't personally have much of any part to do with the making of this character. The modeler and sculptor was Allen and the rigger was Connor. The blend shapes were done by Isabelle and the textures were done by Heather.
I don't have much to say because I wasn't a part of her creation. I did the final checks on the characters to make sure that each had everything they needed on them. In that, I remembered that her glasses weren't added to her face, she still needed eyelashes, eyebrows, and that she needed shoes. I did some sock shoes that were also applied to her rig. I also worked to paint on her eyebrows and add on her eyelashes. To make it easier on the animators I hooked up a set of small controls that would move the eyelashes and eyelids at the same time (we didn't have time to hook up the blend shapes to any facial control panel). With the blend shapes for the eyelashes and brows, the eyelashes had theirs made but because of time, we decided to do the brows as needed.
The hands of the characters we separated from the body and Connor worked to make sure people wouldn't notice the caps.
Hunter
As the project went on this character was, sadly, neglected due to time constraints. We began to work on parts of him on a need-to-use basis, and because of that, he wasn't as complete as the other characters. I also got to work on him more because I was, in part, catching things that still needed to be done. The modeler and sculptor was Megan and the basic rig was done by Misha, with the eye controls hooked up by myself and the weights were painted by Connor. The blend shapes were done by ___ and the textures were done by Heather.
As said above, this character was largely but on a back burner so because of that, I was keeping a close eye on him. Around the time granny and troll were getting their eyelashes and brows, the hunter got his. With the blend shapes for the eyelashes and brows, we hadn't added the shapes yet so I didn't hook anything up for him.
He also got some shoes when we remembered granny needed some. We need to bounce some ideas of how to keep his quiver on his back while he moves. I think we will probably have a kind of constraint that follows something on his back and the quiver is parented to it. However, I'm sure there are other options we can entertain.
Models
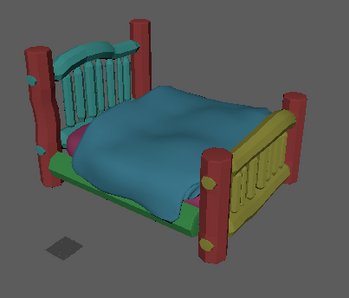
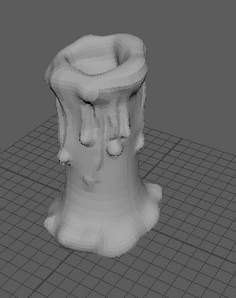
Most of our models were either going to be inside the house or in the garden. Those would be the main locations that made models would be. We planned to use Speedtree for many of the trees so largely the forest. We planned that all the models would be slightly stylized and the textures would be more realistic.
Honestly, I didn't make a lot of assets, so in lieu of that I'm going to show general assets with some model turntables. During the time the models were being done I was on the animatic team and working on reorganizing us and our files. I chose to take on less so that I wouldn't be a liability, by having a lot of models I might not be able to finish on time. The turntable at the end shows the assets I made. I chose to organize the table with both interior and exterior models because I didn't do a ton of models.
Interior Models
The majority of these aren't mine but I want to show how the different models look and meld with each other. I think that it's important to have them seem like they work together. These go into the house. Originally, we were going to have more shots inside where people can see the interior of the house. When the short was cut into a trailer the kitchen corner and door areas were somewhat cut. There's still a shot near the bed and one in the last corner where the couch is.
Exterior Models
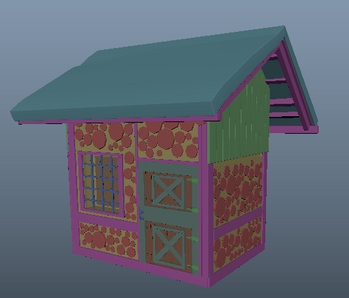
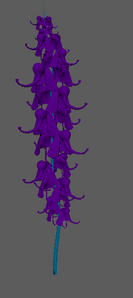
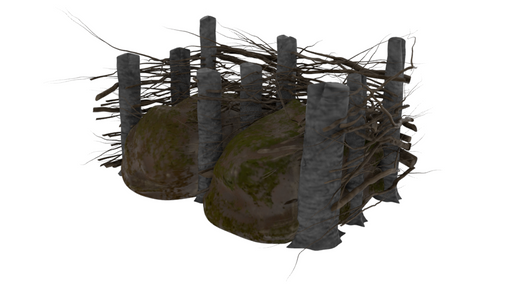
I had some more models in the exterior things. I also happened to work on the grass and thatching of the house, both are made with maya's paint effects. So I consider it more set dressing or something like that because I didn't really "make" the model, I just placed it. Most of the models in the exterior are in the garden, the rest of the forest trees, largely, came out of SpeedTree. Flowers and things were made by hand because in large part because we would have more control to make the model more stylized.
Models I worked on
I was on the animatic team during the time we were working on models, also I was working on reorganizing us. We needed to shift away from a model pipeline (production focused on moving assets through to completion) and I was working with the co-leader to move us to a kind of sudo-shot pipeline (in our case finishing animatic then moving to sets and animation). Honestly, only now do I know that the thing we were shifting to was actually close-ish to a shot pipeline. Anyways, I took fewer models because I didn't want to take on so much, while already working on two other things, not to mention my other classes.
Towards the end of modeling, I did have to pick up some more that were left as blockouts for too long and needed to have a finished version. The vines in the garden box were also done by me, I had forgotten them when I was trying to render this. The lighting is from a file Heather made for texturing, I asked her for it and am honestly using it on, like, a lot of renders.
Sets
These are the sets that were used in the trailer. I did my best to describe the work that people put into the different sets. There are four total: the forest with the bridge, the garden, the exterior and the interior of the house. The house ones somewhat blend together but it was easier to divide up labor thinking we had four.
We set up the biggest parts of each set so that animation would be able to start as soon as possible and would move and shift things as needed based on the animations. As we went along we filled in the sets to make them look nice.
The ones with less just mean I didn't do much of anything on that particular set, and that I don't know a whole lot about what went on with it. Most of the images are based on things I did or helped out with that's why some of the images seem random or like big jumps in progress.
Forest
I didn't really have a part on this set. Heather did both the forests. I don't really have much to say because I didn't really take part in the making of this set.
I added some ground grass later to help give the ground something. However, I was given the grass a little later after it was deemed that it needed something besides a texture for the ground.
Exterior House
The initial blockout of the house was done by Isabelle. Later, it was revised. The exterior of the house was made by Isabelle, and the logs got a sculpt treatment by Allen. That way the logs were not solely reliant on textures. The thatch was done by me using pain effects because it would take up less space and use less time but still give a thatch effect. There were some major issues with the walls and I was brought in to try and help. I managed to find the solution which was to make the wall and export it together. Not the best method but it worked and we couldn't have random logs up and disappearing at random.
Garden
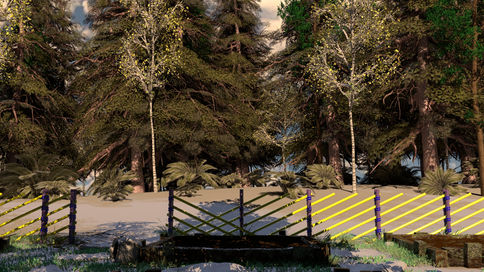
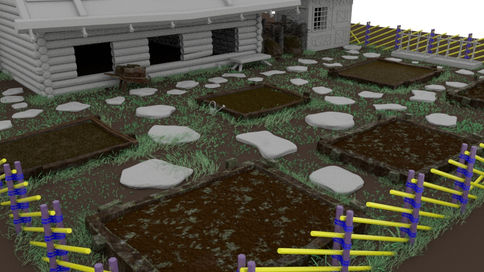
I worked on set dressing the garden with Megan. We set up the garden box locations and divided up the work. The shed and compost were already in their specific locations but we added something to them to feel more used. Megan worked on the shed and I did the compost. The stone path was done by Megan while I did the grass and fixed up the fence. We each took 3 garden boxes; Megan got two vegetable boxes and one flower and I got two flower boxes and the squash/tomato box.
Interior House
Working off some early blockouts of the exterior of the house that Isabelle made, I set up the initial set dressing of interior. The large assets have largely stayed in their initial locations after the final interior blockout was done.
I did the set dressing and placement of things in the images that are simple colors and grayscale, up until the render of the interior with the baby blue color were set dressing and layout. The final set dressing of the interior goes to Isabelle and I added in the rugs a little later.
Animation
These are the parts I did for animation. As a group we were running out of time and we needed the animation to be worked on. So everyone got assigned parts to do some golden pose/blockout animation. That way the VFXs artists could start work and the animators could get a good base down. These were the parts I was assigned adn worked on.
I don't believe animation was ever a strong suit of mine, but I did like what I managed to do.
seq 10_10
Golden Poses
This is the shot where troll is cowering behind granny and decides he should be protecting her. I never did get it to a place where I felt like I was actually helping the animators. I attempted a quick walk cycle but realized that I wasn't good at it and it would probably
seq 10_10
Final animation
This is the shot where troll is cowering behind granny and decides he should be protecting her. This is the clean up Isabelle did an d
seq 10_15
Golden Poses
This shot is of the hunter drawing his bow and taking aim. I did the original golden poses to help out the animators with getting the shots all started. I don't believe I'm that good at animating but I was somewhat proud of this.
seq 10_15
Final animation
This is the cleaned-up version of the hunter drawing his bow. Connor cleaned up and refined the quick(ish) golden poses I did and made it look really clean and nice. It feels very natural.
Textures
The models were made to be a little more on the realistic side with a bit of weirdness to the model. The textures were meant to be more on the realistic side. Many of the textures are more on the simplistic side but still maintain some realism. Most of the slides are my contribution to the textures side of the project. I included an image gallery with a variety of textures from the whole project, not just my own work.
Woods
We had a lot of wood in the sets because the cabin is in the middle of the woods. So we needed to have some variety in the wood but also make it feel like it is all from the same kind of region. Largely I made the textures in Substance Painter, I usually made them in block form so that I would be able to manipulate them in Photoshop without the texture falloff.
Misc
These are some items that I textured that didn't really fit into wood or plant items. I did many of the rocks using a combination of two textures from substance share.
Plants
A large part of being in the woods is having plants. I worked on a variety of plants. Many used fairly simple models. The textures I did are fairly simple but look decent. I worked on them using a mix of Photoshop and Substance Painter. Mainly relying on Photoshop because of the detail and manipulation of images.
With other
These are just some pictures of a bunch of different assets. This shows assets together and models and textures work together.
All Assets
Post-Production
There was much time for any real post-production work. Things were set up with the assumption that if there were some things that we wanted to do in post we could. We set up a handful of light AOVs so that we could manipulate the lights without having to rerender. Sudo-render laysers were also made by pulling things directly and rendering a fully black and white version of things so that the alpha channels of the images could be written out quicker.
Editing was done mildly with a reliance on fades to black. We also had quite a bit of retiming to feel like towards the end things are getting tense and the pace is picking up.
These are some progression shots of the compositing I worked on. This was the progress that I worked on after the fact. With the original renders, we didn't have a chance to do any compositing. So I did it a little after the fact. The first few are contact sheets that I used to compare and to make the colors more uniform for similar shots.
Final Product
Troubleshooting
There were a ton of characters under the human IK tab. I tracked down the source and started to delete them to make the animators' lives easier.
I like attempting to understand what happened so I'm choosing to write why I think something happened.
What I suspect happened is this: I know all four of the tools were made in one maya file. For one of our reviews for class, I think the maker of the tools pulled the characters into a file to show a cloth demo, and when they were done rendering they just deleted the characters. Then imported the tools. They saved the file of the tools and then later separated the tools. Hence why the rigs are labeled cloth and some on every tool. That's just a guess.
Some rigging troubleshooting. I was in charge of rigging this character. His jaw was weird for a while and wouldn't follow his head no matter how I attempted to link it. I also asked some fellow classmate riggers from other groups and they were puzzled. It was an odd day. I eventually went back to it to fix it.
I don't really get what's happening with rigging issues I assume it's just about how I was hooking it up or that I wasn't doing one small step or another but I'm honestly not sure. In the end, I did get it to follow.
I eventually did figure out what was wrong and it was that the up vector for the aim was being hooked to the jaw. It should be hooked to the head instead.
Also here are some odd weight painting issues I ran into. I start out by always centering the character because I've rigged and painted weights on non-centered characters enough to know to start by centering.
I didn't really figure out why the character was having the weight mirroring issues that it did but I decided to mirror what I could and manually paint the rest. We were running up on our deadlines so I informed my group and moved on to some set troubleshooting.


This was one of two set problems. Not really sure what happened but it was consistent so it needed to be addressed so that it wouldn't become a bigger problem.
So what was happening is that for the set dresser the set was like the first image. But for anyone else who attempted to reference it quite a few items would go back to the origin point of the grid. We fiddled with it a bit but it wouldn't stay. We think it might just be bad references coupled with using maya ASCI files (we needed to change the code back to 2019).
I paired with the set dresser and we re-did the references. We used a geometry version of the file to put things exactly where they were before since the work was very nice and would be a shame to waste it.
This was the second set problem. I have no idea what's happening really. No matter what we did the exterior wouldn't all show up as references. It might have something to do with how many duplicate references there are. However, that has never broken things before. We couldn't rely on the reference not breaking and logs missing so we came up with a new solution. The solution I came up with was to import all the logs. Since there are only 20 unique logs they were each given a texture and assigned their displacement. The texture artists will just assign to the main file with all the logs when they're done with the textures. We tried it and nothing vanished and the house could now be referenced so that's how we left it.


There are various gaps and cracks seen from between the logs. Realistically there should be that's just how log cabins are built. Mud is used to patch between the logs so there aren't drafts. However, the gaps were left in without something behind them and it was weird and felt like some glitch. I eventually went back and patched it by running a piece of geometry with a solid color throughout the house.
We didn't need the blocks for some of the further away shots but many of the shots that were closer needed it. The gaps were more visible when lighting was added. It was easier to add the blocks and make sure we didn't need to fix it later than to risk it.
I happen to do a bunch of the render checks before the actual renders. I do it mostly to make sure things still look fine after things in the set have been changed or fixed. And while adding the animations. One of the issues I noticed was that some items blew up to 3-5x their original size and only some parts of the item blew up so it wasn't intentional. That and the fact I'm well acquainted with all the sets we are working with and have spoken to the makers of them. Anyways, the garlic was one such item, I messed with it a while but gave in and usually just redid the reference because it was fine if it was redone.


So I'm calling this issue parallel rendering. Usually, one should be able to render different shots referencing various assets and not have any issues. Our renders didn't allow us to render shots like that. We seemed to need to wait for each shot to finish before rendering any of the others.
Different shots seem to keep trying to replace files needed for renders as the two try to output rendered images. So I started to look into the files to try and figure out why they won't render together.
I tried it a few times and it seems there was something wrong with the original file. When I remade the file slowly adding things to a brand new file the school's render farm seemed happy. I did this on my own after the project's conclusion because I wanted nice renders.
Blog Pages
Here's a sample of my most current blog entries for the project. They go into more specifics of what I was doing during and for the project. If you would like to see more please feel free to go over to the blog attached to the website and select "Senior Thesis".


